
Tips & Tricks – CONNECTING TO WIFI

About This Project
One of the first things you’ll need to do to activate your Pigeon Digital Photo Frame is connect it to your wireless network.
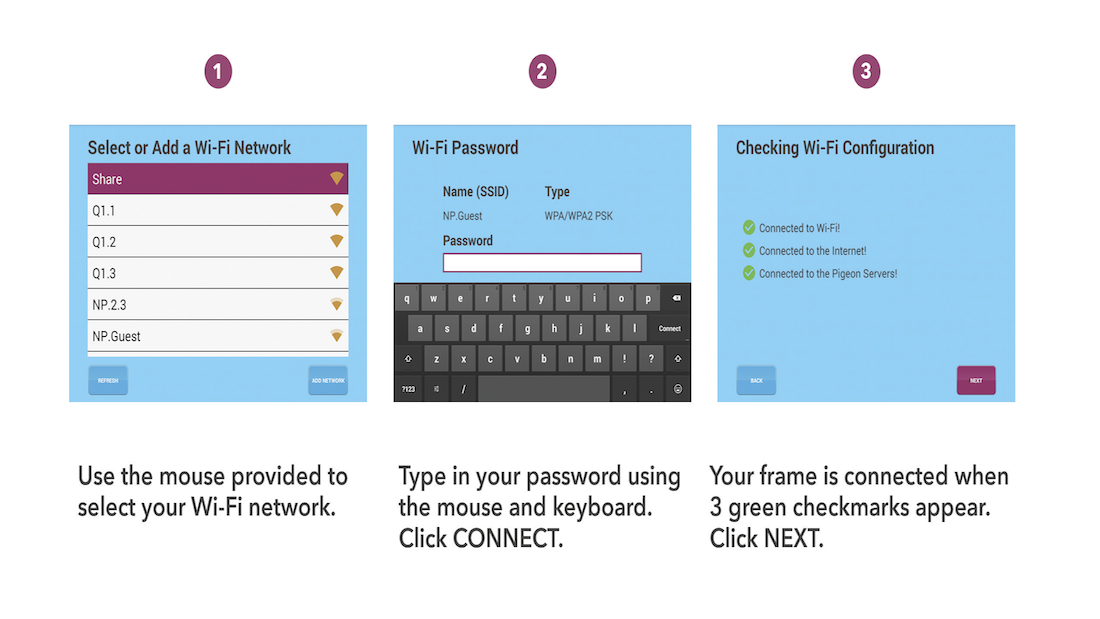
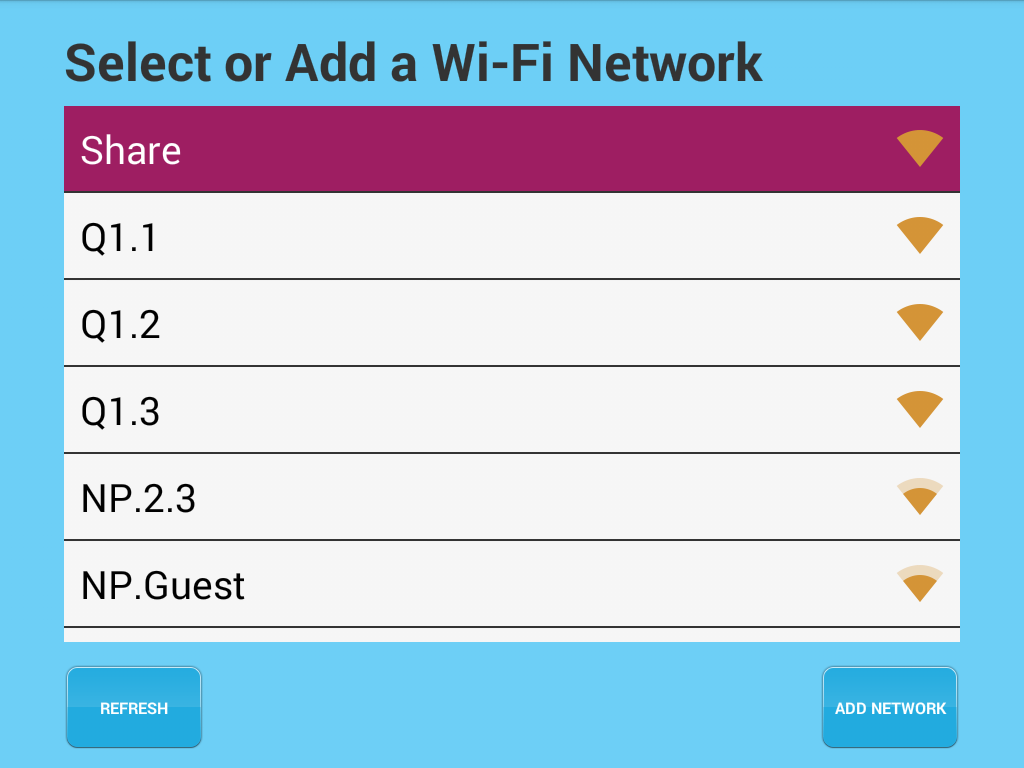
1) Select Your Wi-Fi Network
Following the Getting Started video, your Pigeon Frame will automatically list the available networks in your area.
Using the mouse provided, click on your wireless network. If your wireless network is not shown, please click refresh.
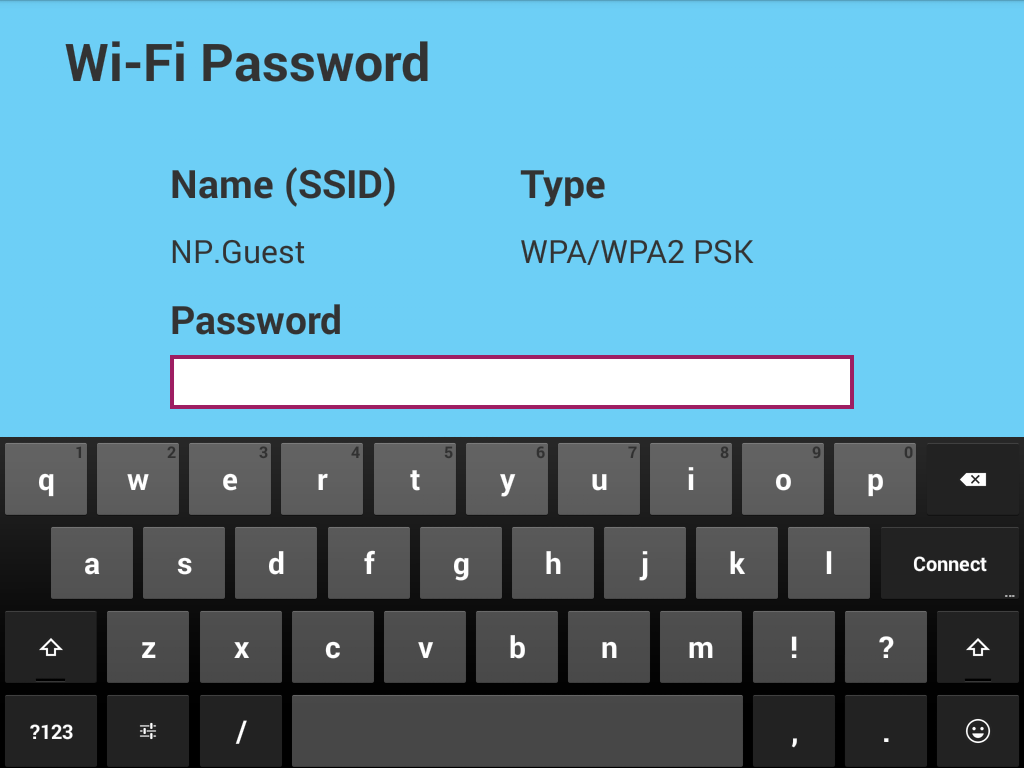
2) Enter Your Wi-Fi Password
Once you have clicked on your network, you will be prompted to enter in your Wireless password.
Using the mouse and keyboard, enter in your password. Click Connect when done.
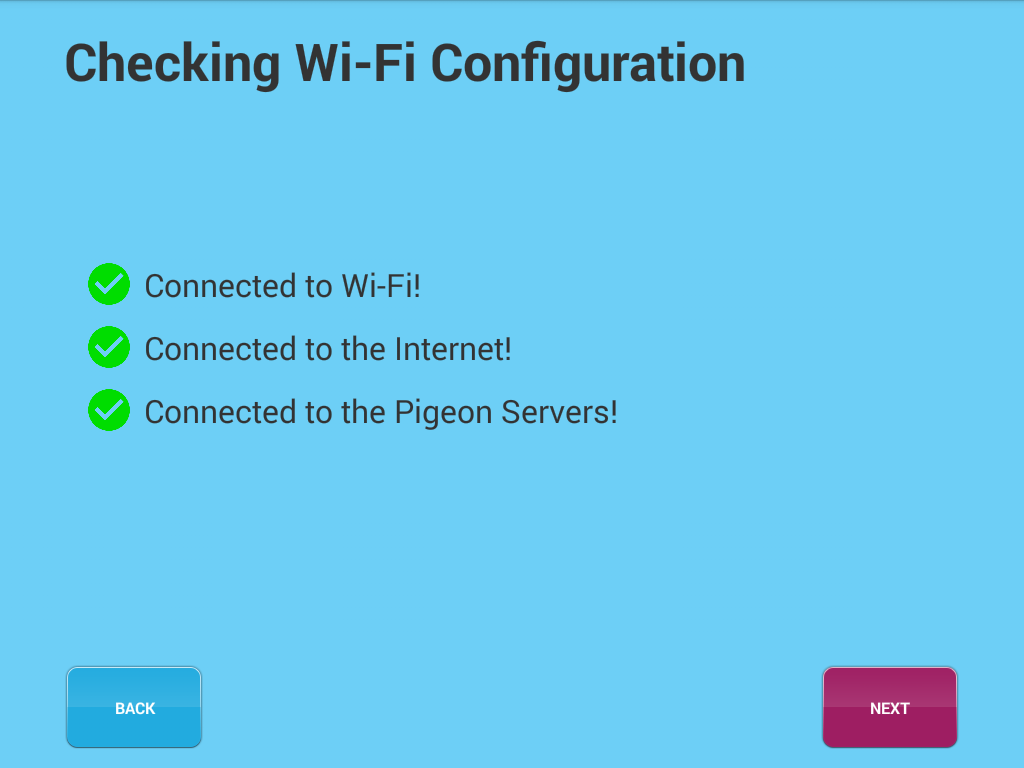
3) Verify Wi-Fi Configuration (Automatic)
The Pigeon Frame will now perform some magic and verify your connection.
You should see THREE green checkmarks appear on your screen once complete.
4) Wait! I see a Red X!
If a red X appears beside one of the steps, please do the following:
1) Reboot Your Frame
Unplug your frame, wait 30 seconds and then plug back in.
2) Reboot your Router
Unplug your wireless router, wait 1 minute, then plug back in.
After completing both of these steps, please try and re-connect to your wireless again.